
General, PiBOX India
Raspberry PI – Headless Setup
The method of setting up the Pi without ever connecting it to a monitor or keyboard is known as running the Pi “headless”. During this Headless Setup process, the Raspberry Pi is powered ON with a special OS image from the micro SD card and remotely connecting to the Pi through a network connection. Hence for this setup you would need,
- A micro SD card (8gb or 16 gb) and a micro SD card reader
- Laptop/PC to download OS and remotely connect to the Pi
- Network connection via Wi-Fi or Ethernet port.
Headless setup is recommended for experienced Pi users, as the initial setup involves using commands via Command Line Interface to operate the Pi. The step by step procedure is as follows.
1. Choose the OS image:
The Raspberry Pi foundation has various options for the OS image. You can select your choice of image and download the .zip file. https://www.raspberrypi.org/downloads/raspbian/ 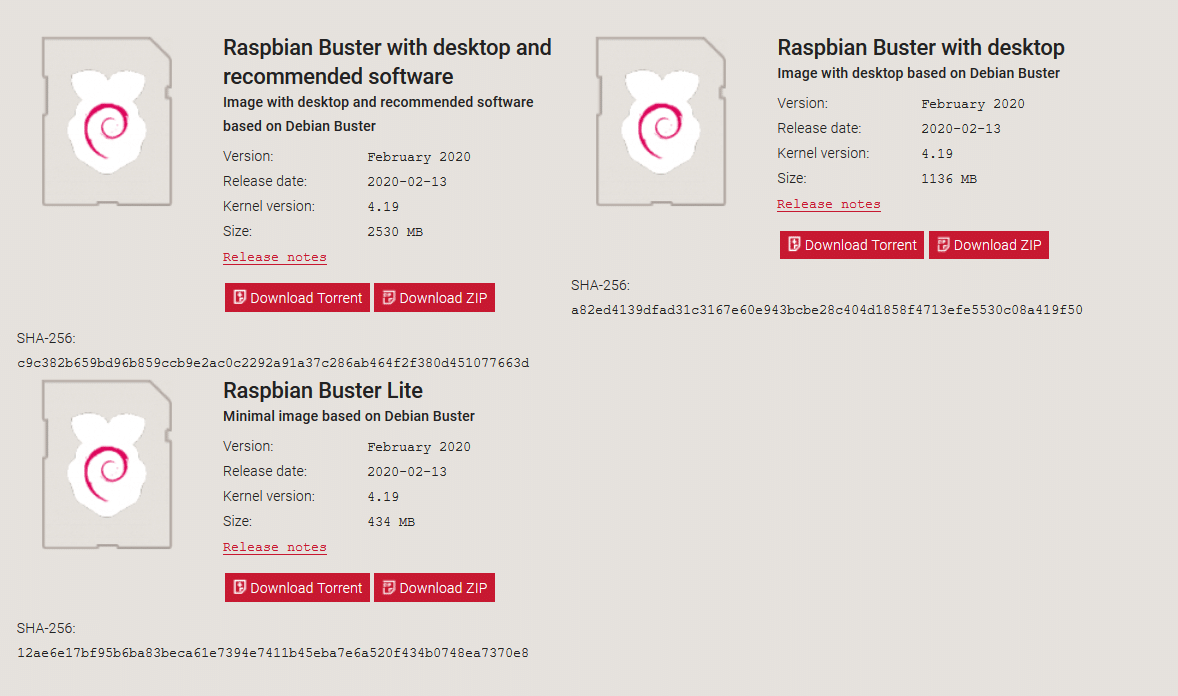
2. Choose an SD card Imager:
Raspberry Pi Imager is a recommended tool from Raspberry Pi foundation. Please download, install and launch the imager tool. You can select your choice of OS from the list or also a local .img file from your PC/Mac. Please ensure to format the SD card using the SD card formatter tool, before starting. You may also use other tools like Etcher to burn the SD card image.
https://www.raspberrypi.org/downloads/
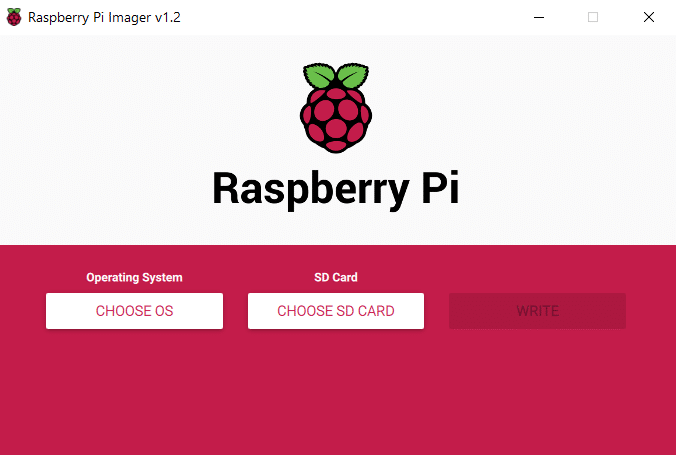
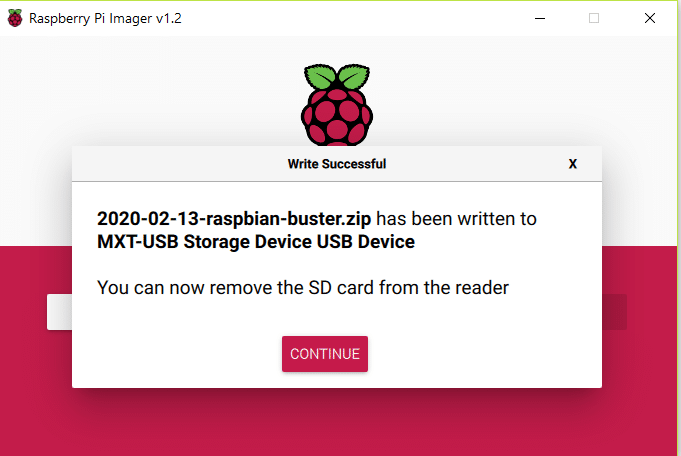
The SD card is now ready with the OS image.
3. Enable SSH during boot:
Write an empty text file named “ssh” (no file extension) to the root of the directory of the card. When it sees the “ssh” on its first boot-up, Raspbian will automatically enable SSH (Secure Socket Shell), which will allow you to remotely access the Pi command line from your PC.

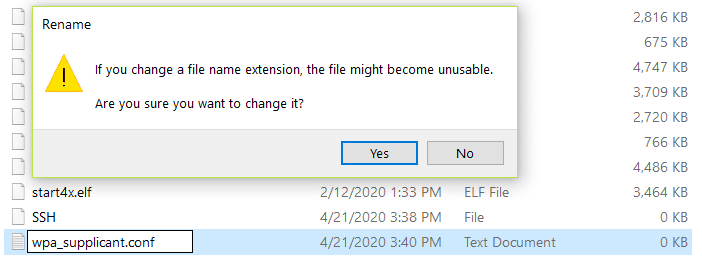
4. Enable Wi-Fi during boot:
To setup a Wi-Fi connection on your headless Raspberry Pi, create a text file called wpa_supplicant.conf, and place it in the root directory of the microSD card.
Edit the file and add the below text to the file. Please use your realtime SSID and password : ssid = your Wi-Fi SSID and password = your Wi-Fi Password.
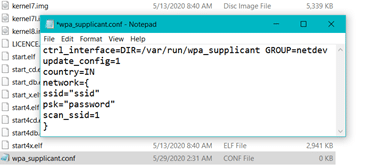
ctrl_interface=DIR=/var/run/wpa_supplicant GROUP=netdev
update_config=1
country=IN
network={
scan_ssid=1
ssid="ssid"
psk="password"
}
The Raspberry Pi is now ready to be powered ON. Insert the SD card and power ON the Pi. If you can connect the Pi directly to the network using an Ethernet LAN cable, you can skip the above step to enable Wi-Fi.
5. Find the IP address of the Pi:
You can login to the Wi-Fi router with the admin credentials to get the IP address of the Pi. You can also use tools like ‘Advanced IP scanner’ to scan the list of devices connected to your network. Alternatively, you can use ‘raspberrypi’ or ‘raspberrypi.local’ to login to the Pi via the SSH client.
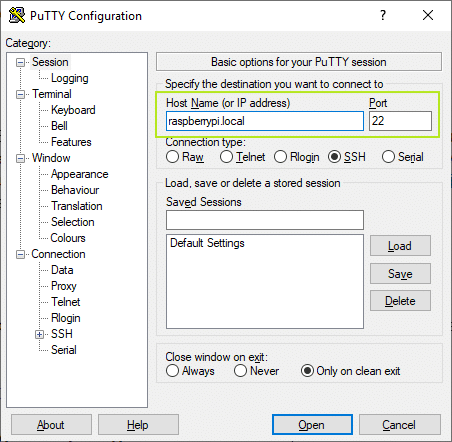
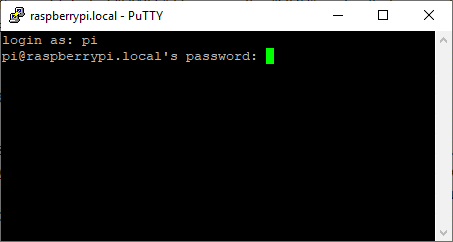
6. Connect to the Pi using SSH client:
You can use Putty or other SSH client software tool to login to the Raspberry Pi using SSH.
Use pi as your username and raspberry as your password for the SSH login credentials.
You can use the sudo raspi-config in command prompt, for various configuration settings.

You can use the sudo raspi-config in command prompt, for various configuration settings.
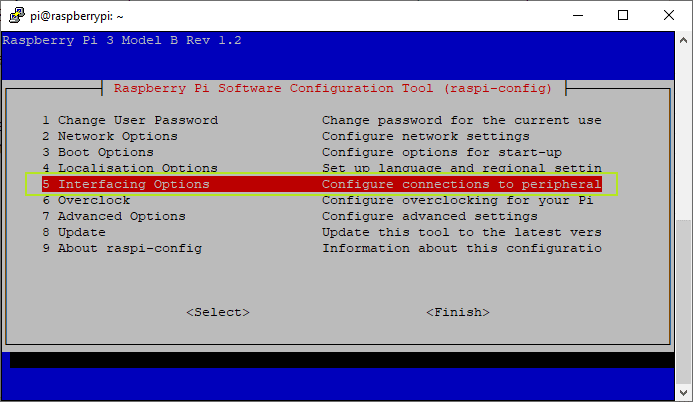
You can also enable VNC from the Interface Options.
You can now use your Pi by connecting remotely via SSH or VNC. To protect the Pi from static damage, a good quality Pi case is always recommended. For the latest Pi4 boards, the processor heating is a common issue and a quality heat sink is recommended.
Please shop our PiBOX India products for a heavy duty heat sink, Dual speed Fan with Case and other Raspberry Pi accessories.