
General
Begin Pi learning!
Dec
We, at PiBOX India, are honoured to assist you with the Pi setup and basic troubleshooting.
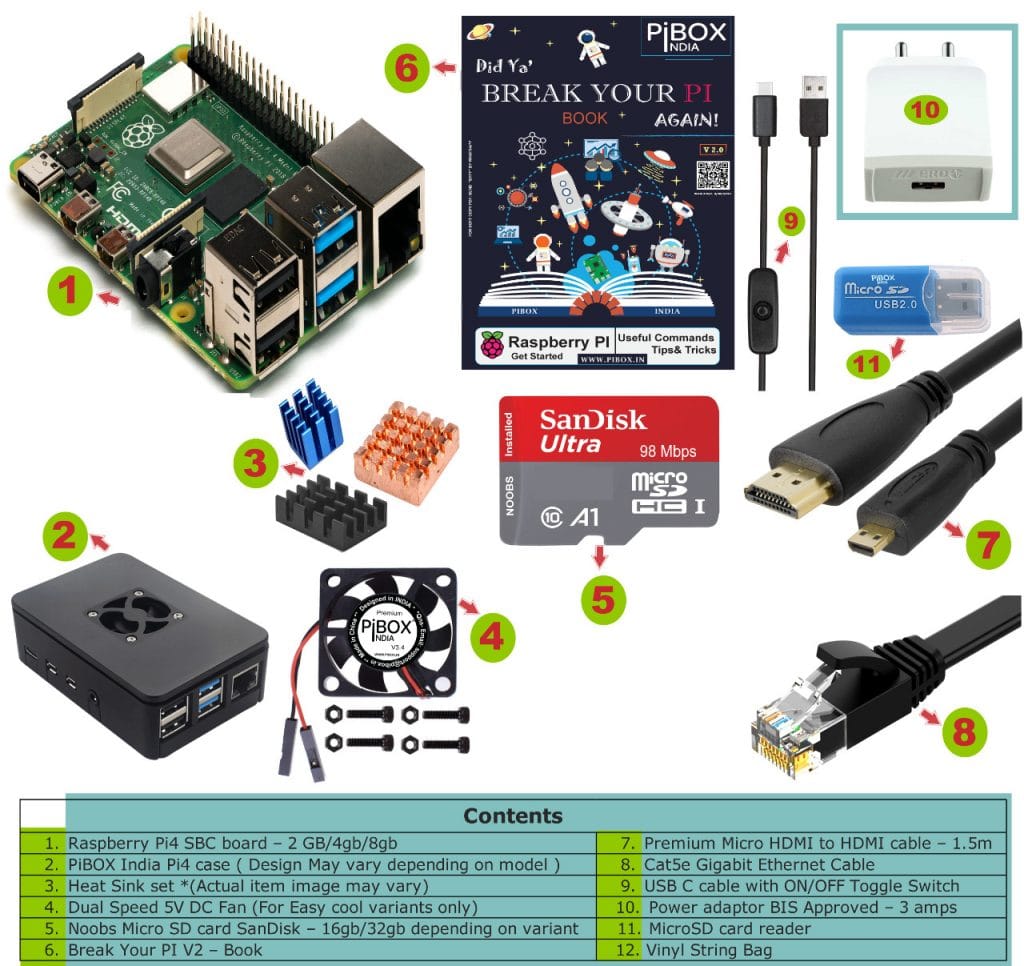
We have curated some of the most useful and value-adding components to our PIBOX India combo, to help you have a good start in your Pi learning. Please find below the components

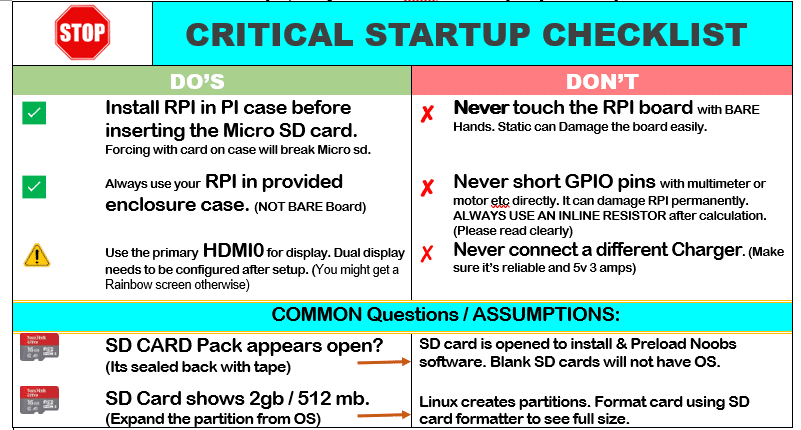
CRITICAL CHECKLIST:
Below is the critical checklist for the Raspberry PI 4 combo kit.
Installation:
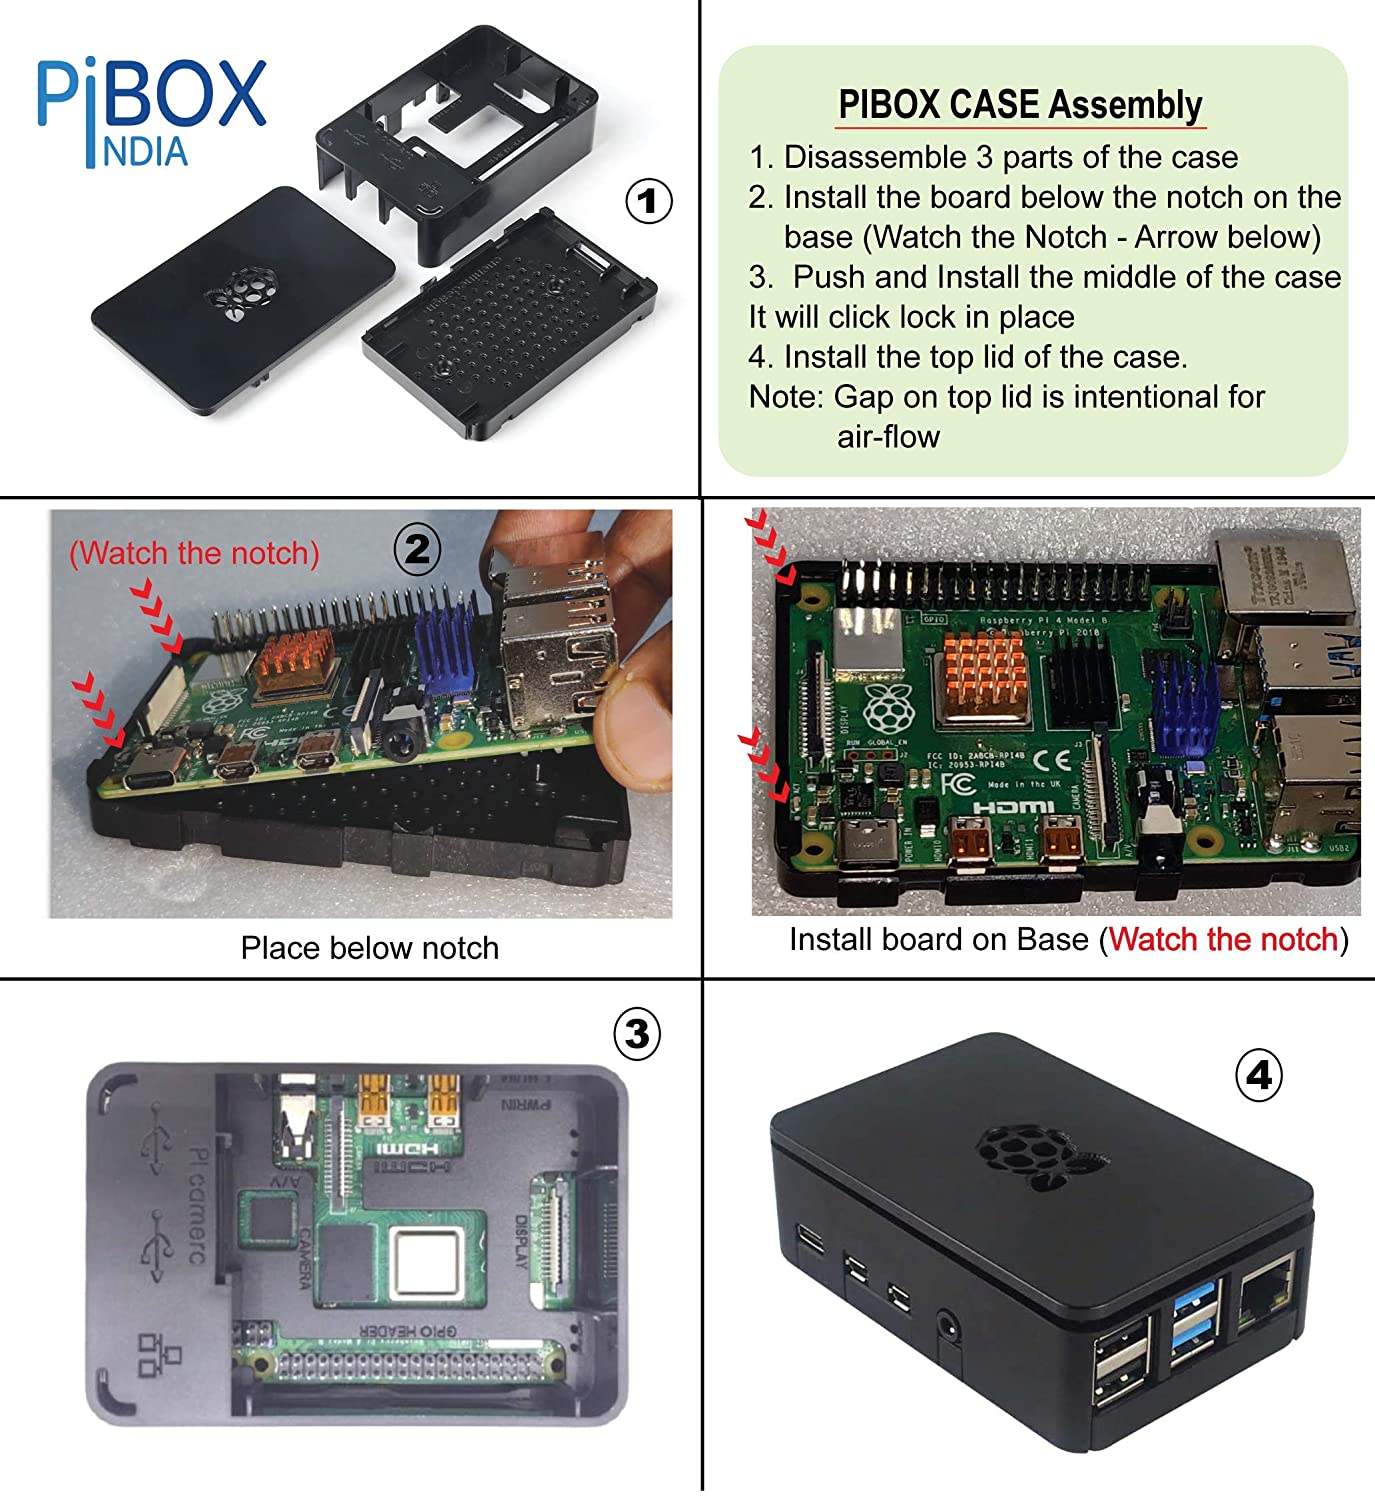
Please find the below steps to assemble the peripherals to initiate setup.
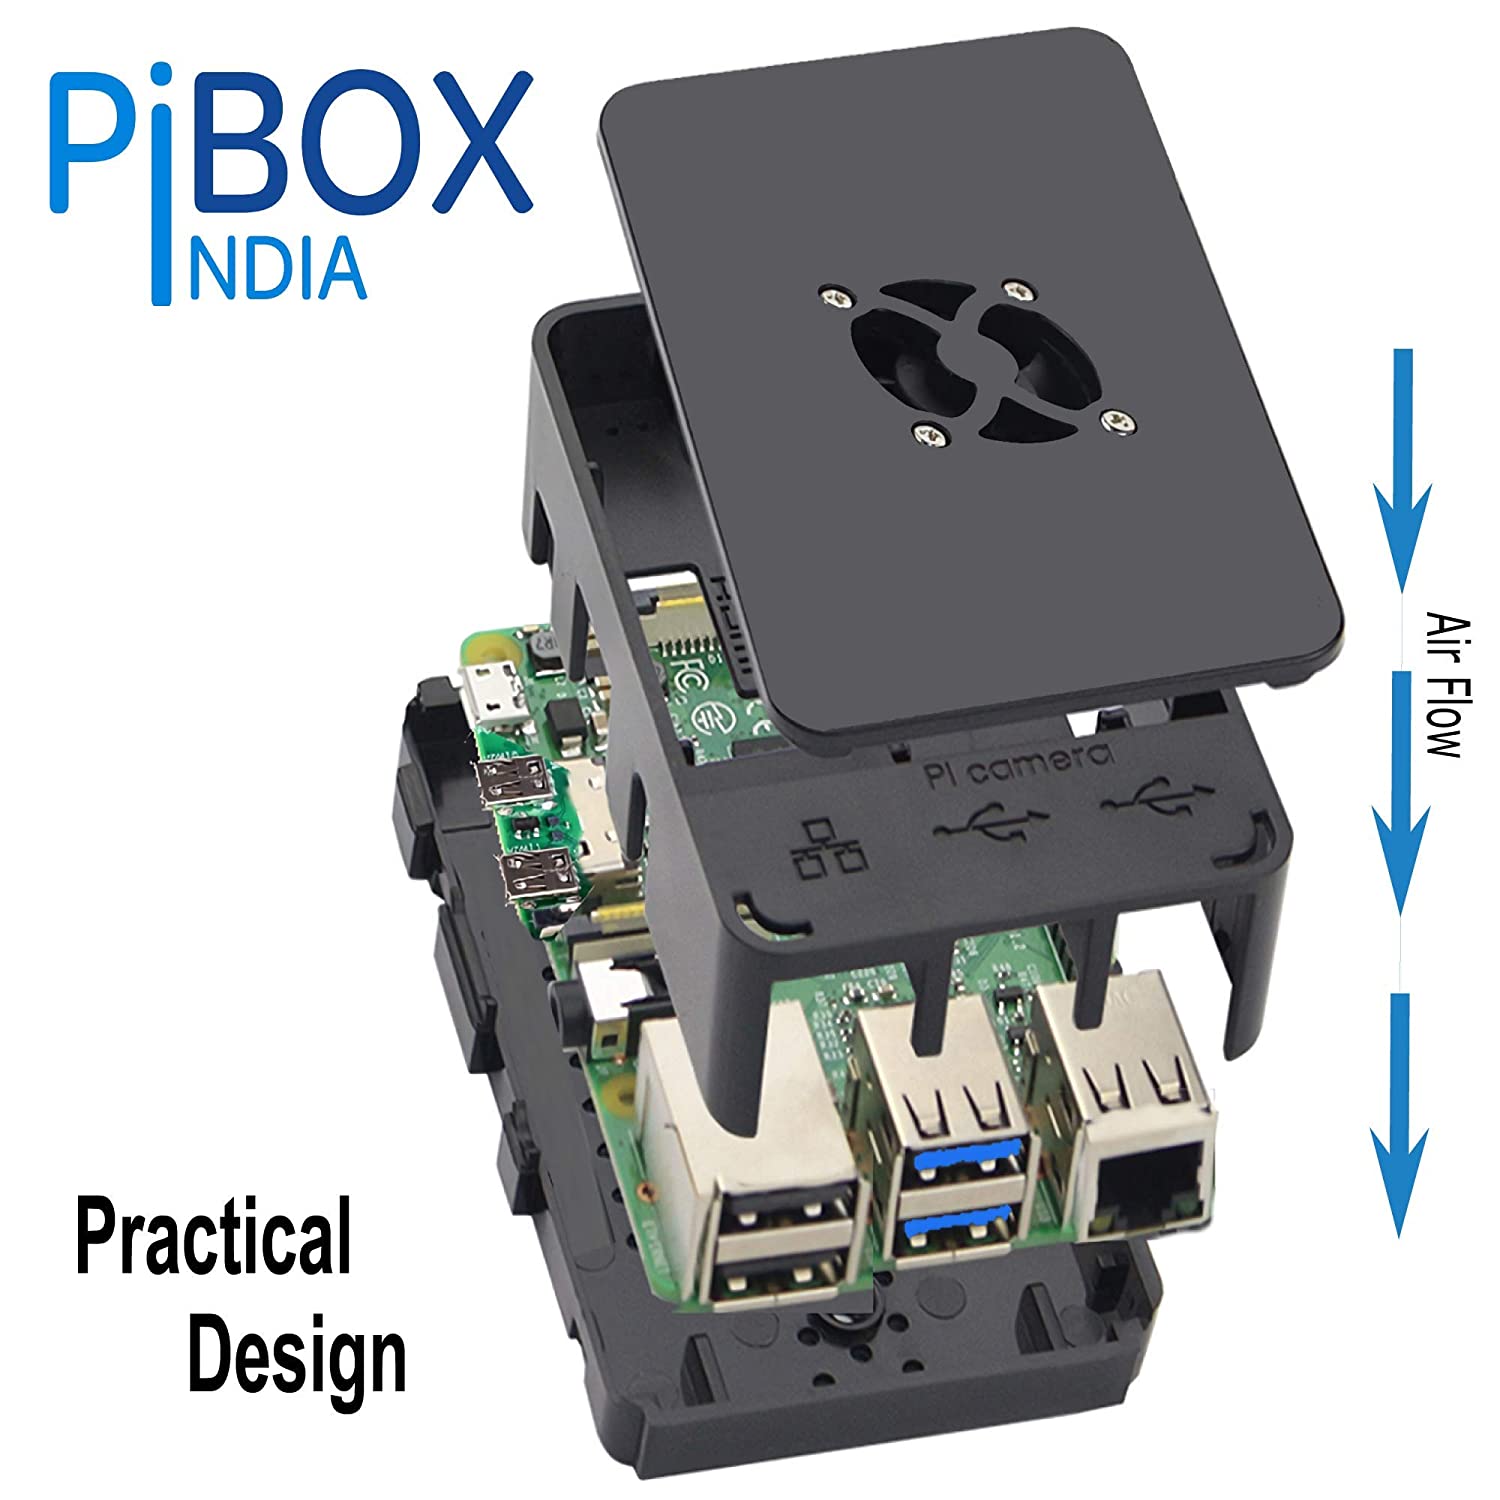
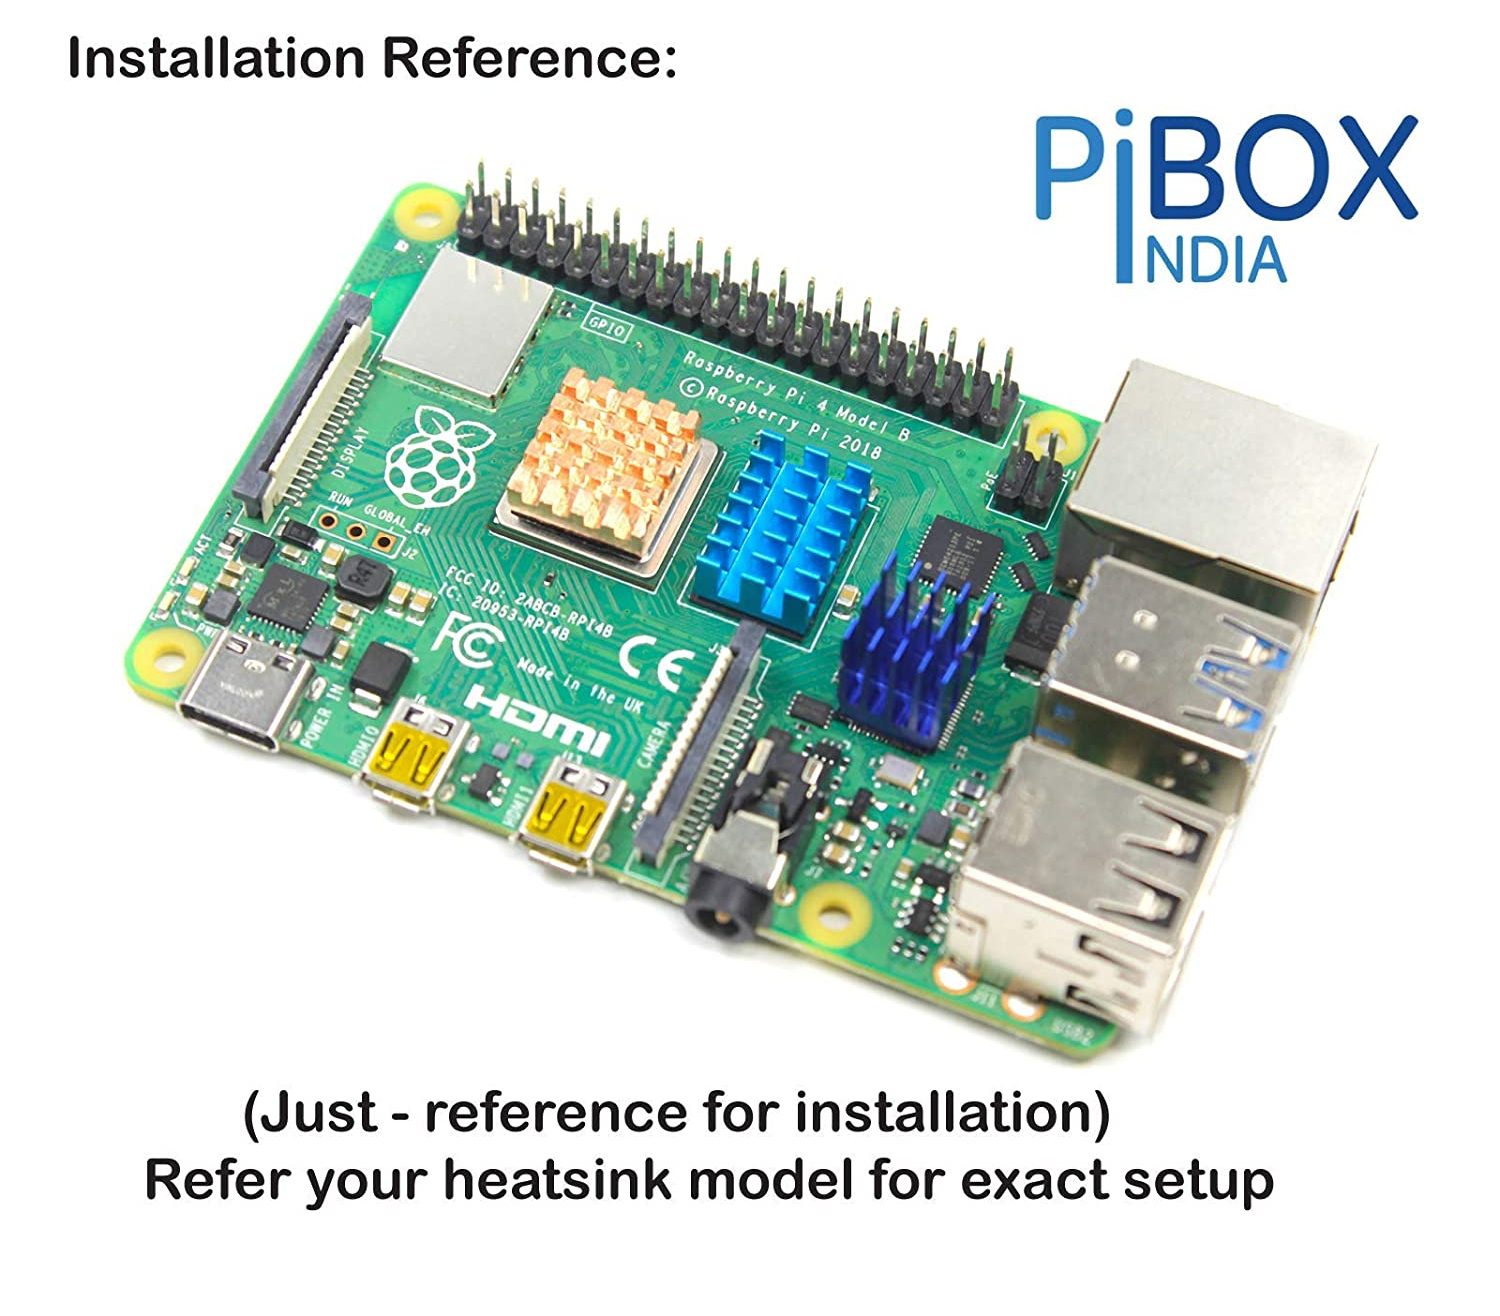
- Assemble the board in the case – Follow the below 4 step process. You can install the heatsink as shown below once the case installation is complete.
The Raspberry Pi4 is powered by a Broadcom BCM2711 SoC with a 1.5 GHz 64-bit quad-core ARM Cortex-A72 processor. The Pi4 needs a well-designed heat ventilation and it is recommended to use the Pi4 with a cooling FAN.
PiBOX India EasyCool combo variants come with a dual speed 5V DC fan and a compatible case.
- The Pi4 case with fan, has 4 screw holes on the lid, to mount the fan. Please mount the fan, following the direction of Air-Flow required.
Follow below page for detailed fan installation and setup:
Raspberry PI 4 Fan Install (Dual Speed)
Peel off the seal from the bottom of the heatsinks and paste the heatsink as shown in the image. *(The heatsinks design varies depending on the Pi4 combo variant) You can now assemble the lid of the Pi4 case.
(INSTALL HEATSINK AFTER THE BOARD IS INSTALLED ON THE CASE)
MICROSD CARD:
- Insert the microSd card (with your choice of OS) at the bottom of the Pi board (The card cannot be completely inserted into the slot. A tiny portion of the microSD card protrudes outside. Do not forcefully try to insert the card)

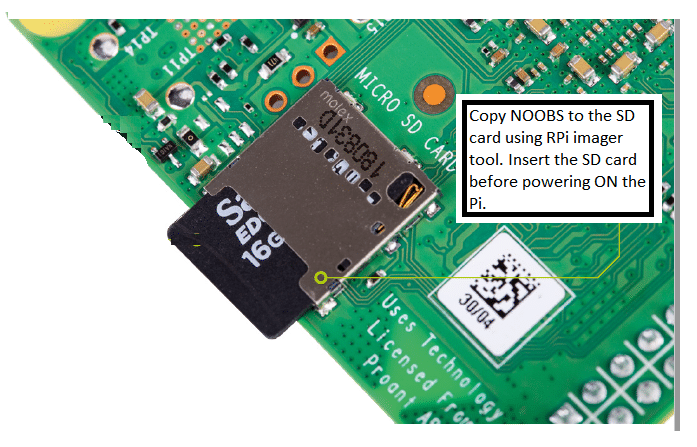
( DO NOT TRY TO INSTALL MEMORY CARD INTO RPI BEFORE CASE INSTALLATION. IT CAN BREAK YOUR PI)
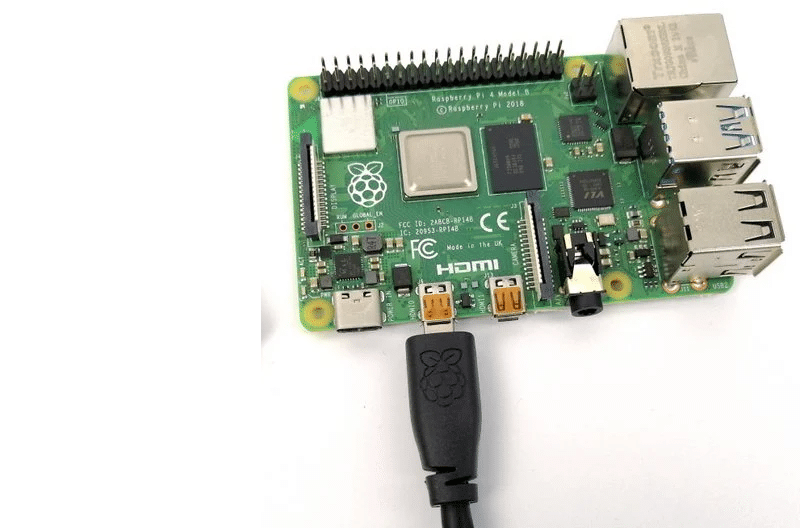
MICRO HDMI
- Attach the peripherals like microHDMI cable (to HDMI0 port only, which is the port near the USB C power port), USB keyboard, USB mouse, Ethernet cable (if needed) to the Pi board.
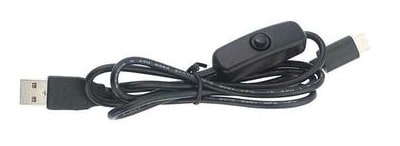
USB C CABLE:
- Insert the Pi4 charger and power ON the Pi. PiBOX India has a custom made USB C charger cable with ON/OFF toggle switch to safely power ON and power OFF the Pi.

The hardware setup of the Pi is complete. For the first time, when the Pi is powered ON, with a new copy of NOOBS or other OS image, the OS should be installed. From the subsequent times, the Pi will boot into the OS desktop page, automatically.
The Pi does not have an internal memory. It boots from the OS loaded onto the microSD card. Please ensure that you have the right OS image on the microSD card.
I just received PiBox 4 purchased from Amazon. The final cover is not attaching completely after placing the RPI board, fan and everything. There is around 1 mm gap betten the middle and cover rack. Basically the notch on the cover rap is touching the ethernet port and not going any further down. Is this how the box should fit? Or do I have to adjust the board position properly and finally the cover will attach without gap?
Its intentional for the airflow. Please check pibox.in/pi4fan
Is the Kit not available anymore? I have ordered the complete kit two times earlier but unable to find it for purchase anymore.
There is shortage of RPI. We have the 4GB kit available in short qty now but the chipset shortage is affecting RPI globally.